I have 5 brothers and sisters, and when we started having children, the yearly excursions to a restaurant, with crying babies, impatient toddlers, long waits, crabby waitresses made it not-so-much-fun. So now we have a nice family party at my house every year. The food is ordered, and I used to use paper plates (no extra work for MOM!).
But now we use all the beautiful handmade plates I’ve been collecting for the last 10 years. I try to get two of each potter I admire, so we have a nice time deciding which to use for the dinner.
But I had no plates for dessert!
So, two years ago I started making a few dozen dessert plates, and sent everyone home with a sticky handmade plate, that they tell me they use for breakfast, sandwiches, etc. It really makes me happy.


I have to plan ahead, so here are some details of the making of this year’s plates.
First I decided on a shape, from a great box I got from some pajamas:

I tried to roll out a slab, cut out the shape and dry it slowly on a foam pillow. Two problems: only had two foam pillows, so this will take forever, plus one more day!
Also, the plates dried almost totally flat, so they just seemed warped.
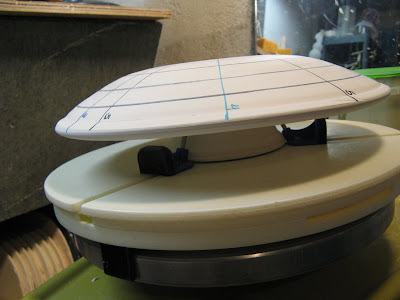
So, I threw some hump molds. Using a technique I remembered from Bill Van Gilder’s DIY show, I threw upside down bowls, with a stand in the middle like a cake stand. This form then can be trimmed to the curve I wanted. Added bonus: I marked up the hump mold with circles, and then divided the circle into 3rds, 4ths and 5ths as guidelines. These worked out great!


I can put the slab onto the hump mold, using my guidelines to center it. Then I use the pajama box insert as a template, cut my slab, soften the edges, and voila! Good to go.


I still have to decide on this year’s decoration. I make a laser decal from some of my brushwork, and keep the glaze design consistent, sort of.
No comments:
Post a Comment